In the past month, the team has been hard at work introducing the new native extensions system for Godot 4.0. GDExtension is a new implementation of the GDNative layer that allows the creation of compiled plugins for the engine. At its core, GDExtension is a C API that enables registration of classes implemented within a dynamic library. This allows dynamic libraries to be used by Godot in a way that is much better integrated than its predecessor, GDNative. Together with the godot-cpp library, GDExtension introduces a system that allows extending Godot to nearly the same level as statically linked C++ modules can.
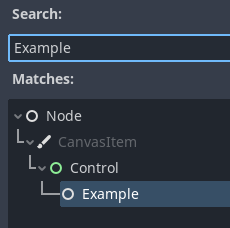
The new registration system is now part of Godot’s ClassDB. This means that classes implemented in plugins are indistinguishable from core classes.
When you add a node to your scene, they are selectable as any other class:

Help pages are automatically made available for your classes, detailing their properties, methods, signals, etc.:
 We’re still working on the ability to also add descriptions to each.
This is a breaking change to the system. GDNative plugins written for Godot 3 will not run on Godot 4 and vice versa. Plugins written for Godot 3 will need to be altered and compiled for Godot 4.
Branches
The logic for extensions within Godot itself has been fully merged into the master branch.
The master branch in the godot-headers repository has been updated to contain the headers for GDExtension. An extension_api.json file that contains definition information about all the core classes accessible from extensions was also added.
The 3.x branch in the godot-headers repository can be used for plugin development using the old GDNative API for Godot 3.
The master branch in the godot-cpp repository has also been updated with the new godot-cpp implementation for GDExtension. It can now only be used to develop plugins for Godot 4. As with godot-headers, use the 3.x branch when developing plugins for Godot 3.
Building the test plugin
We’ll be adding a full tutorial to the documentation in the future. For now, we’ll highlight the test project that is embedded in the godot-cpp repository.
The first step is always to compile the godot-cpp library. The build tools are the same as for Godot itself, so we will be using SCons for this:
cd godot-cpp
scons target=debug
By default, the target platform will be configured to match your host OS. Add platform=<name> to force building for a specific platform. You must compile with target=debug for your plugin to work in the editor. If run SCons for the first time, the C++ bindings code will be generated from the extension_api.json file automatically. However, if you update this JSON file afterwards, you’ll need to add generate_bindings=yes to the SCons command line.
Now you can compile the test project:
cd godot-cpp/test
scons target=debug
Once built successfully, you can open the project in godot-cpp/test/demo in the Godot editor and try it out.
Note: It’s not ideal to have the test project inside the godot-cpp folder. You would normally have godot-cpp stored in a subfolder of your project – preferably as a submodule if you use Git as a version control system. We’ll address that in the tutorial.
Taking a closer look at the test project
Now that the test project is working we can have a closer look at its core components.
In the demo folder, we can see a file called example.gdextension. This replaces the old .gdnlib files and tells Godot how to load your plugin:
[configuration]

entry_symbol = "example_library_init"

[libraries]

linux.64 = "bin/x11/libgdexample.so"
windows.64 = "bin/win64/libgdexample.dll"
Under configuration, we define the name of the function in our plugin that will initialise our plugin.
Under libraries, we specify the name of the dynamic library for each platform.
Note: Unlike GDNative, there are no .gdns files for each class anymore.
The next file to look at is register_types.cpp inside the src/ folder. In that file, we find our library entry point that was defined in our example.gdextension file:
GDNativeBool GDN_EXPORT example_library_init(const GDNativeInterface *p_interface, const GDNativeExtensionClassLibraryPtr p_library, GDNativeInitialization *r_initialization) {
	godot::GDExtensionBinding::InitObject init_obj(p_interface, p_library, r_initialization);

	init_obj.register_scene_initializer(register_example_types);
	init_obj.register_scene_terminator(unregister_example_types);

	return init_obj.init();
}
This code creates an initializer object and registers a number of callbacks. These callbacks allow us to register and construct objects at different points of Godot’s initialisation. For our example library, we use register_scene_initializer() to register our classes.
When we look at this callback, we see that we register our class:
void register_example_types() {
	ClassDB::register_class<Example>();
}
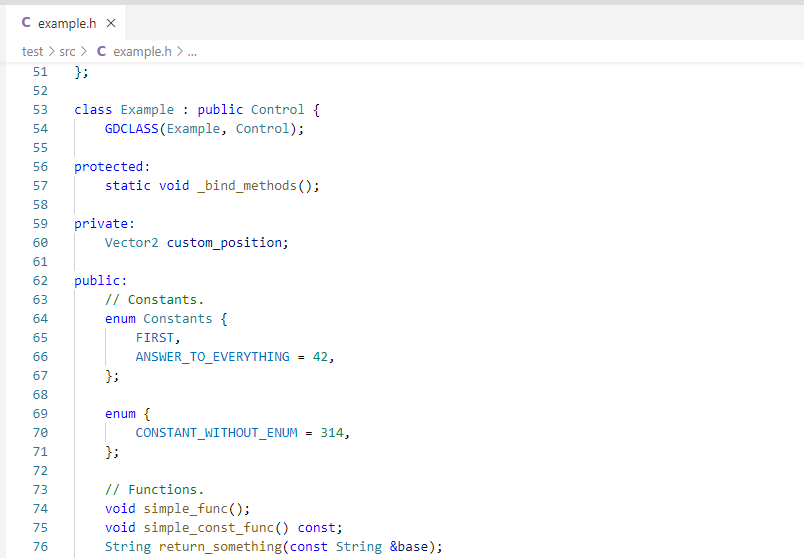
Next, let’s look at a stripped out version of our example class. First, its header file example.h:
class Example : public Control {
	GDCLASS(Example, Control);

protected:
	static void _bind_methods();

private:
	Vector2 custom_position;

public:
	void set_custom_position(const Vector2 &pos);
	Vector2 get_custom_position() const;
};
Our Example class inherits Godot’s own Control node class. Besides the normal C++ syntax, we need to add the GDCLASS() macro so it gets properly registered with Godot.
Next, we see the definition of _bind_methods(). This is the function that will register our methods, properties, etc. with Godot.
We also introduce a private variable called custom_position, plus a setter and getter method for this variable.
In the implementation (example.cpp), we put it all together. First, our method binding logic:
void Example::_bind_methods() {
	ClassDB::bind_method(D_METHOD("get_custom_position"), &Example::get_custom_position);
	ClassDB::bind_method(D_METHOD("set_custom_position", "position"), &Example::set_custom_position);
	ADD_PROPERTY(PropertyInfo(Variant::VECTOR2, "custom_position"), "set_custom_position", "get_custom_position");
}
The first two lines of code register our getter and setter function with Godot. Note that we also name the setter method’s parameter.
This is how you register any method of your class.
The third line however turns this into a property called custom_position.
The getter and setter method logic is just plain C++ code – nothing special to highlight there:
void Example::set_custom_position(const Vector2 &pos) {
	custom_position = pos;
}

Vector2 Example::get_custom_position() const {
	return custom_position;
}
The example has many more things implemented such as constants, signals, methods with a variable number of parameters, etc. It’s a good place to look at how to use those things in your own plugin.
To those who’ve written Godot modules before, this code should look familiar as much of the syntax is identical.
Where to go from here
We’ll have some proper tutorials up soon. Until then, come talk to us on #gdextension on the Godot Contributors Chat or in #gdnative on the Godot Discord. A number of us are working on our own plugins and are sharing source code. One such example is the Godot XR reference plugin, which contains a far more elaborate example.
